You love the scent and glow of your electric wax warmer. After weeks of melts, old wax clings and muddies your fragrance. You lose that punch of pure aroma and get a sticky mess instead.
This guide, how to clean your wax warmer, will clear away that gunk.
One fact: clean dishes boost scent and eco-friendliness. Premium scented wax can last up to 90 hours in a fresh dish. We share pour-out, cotton ball, icebox, and scraper methods. We walk you through clearing wax, rinsing your silicone bowl, and saving or tossing old cubes.
Keep reading.
Key Takeaways
- Clean your wax warmer after each use to renew aroma and hygiene. Premium scented wax can last up to 90 hours in a fresh dish.
- Use one of four methods:
– Pour-Out Method when wax is soft
– Cotton Ball Method with two cotton balls soaked 1 minute plus isopropyl alcohol
– Freezer Method (10–15 minutes chill)
– Metal spoon or wax popper scraper - Rinse trays in warm water with mild soap and dry completely. Skip acetone to prevent damage.
- Mix leftover wax chunks with fresh melts to extend burn time and cut waste. Never pour wax down the drain.
- Choose soybean wax over mineral wax; soy melts burn up to 20 percent longer and cleaner.
Signs It’s Time to Clean Your Wax Warmer

Wax melts lose their scent quickly if you run heavy use without cleaning. A weak aroma drifts, or no fragrance reaches your senses. Hardened wax sticks fast to the wax warmer pan, like old gum.
Excess wax coats the interior of the wax warmer tray, and a fabric picks up a ring of residue.
Lingering bits cling to the tray after each use. A swipe across the pan with a paper towel may leave tinted streaks behind. Sticky spots grab dust and crumbs, spoiling the clean look.
Leftover residue can mix old and new scents, creating muddled smells. Regular cleaning boosts hygiene and renews the tidy shine.
Effective Methods to Clean Your Wax Warmer
Grab a metal spoon, a cotton pad damp with rubbing alcohol, plus your freezer for a quick wax rescue kit. This trio tackles drips, sticky residue, and hard chunks so your scent station stays fresh.
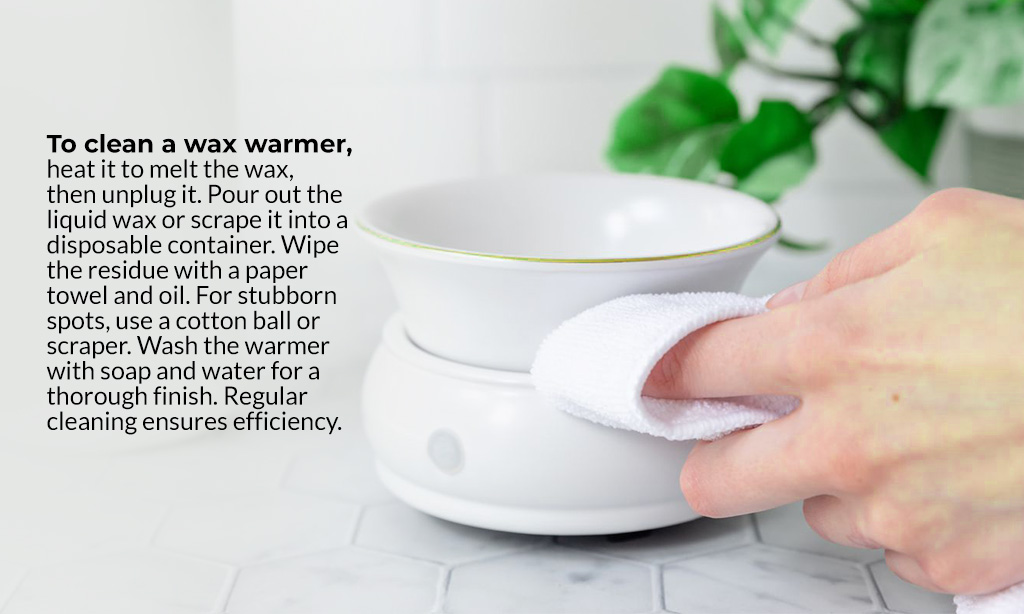
The Pour-Out Method
This method helps clean a wax warmer with little fuss. It works best while wax stays soft.
- Warm the wax: switch on your wax warmer until the wax block turns to liquid wax.
- Pour out the melted wax: tilt the wax warmer dish and dump it into the trash after a minute of cooling.
- Scoop up soft clumps: use a spoon to lift out residual wax bits.
- Wipe off wax residue: take a damp paper towel to clear the dish surface.
- Dry and remove spots: pat the dish with a microfiber cloth or dab with alcohol on a cloth for stubborn wax.
The Cotton Ball Method
You can zap wax residue with cotton balls. They grab hard wax and leftover oil.
- Place two cotton balls into the pool of wax to clean the wax bowl.
- Let them soak for 1 minute to lift soft wax.
- Lift the oil-soaked balls with tongs or a spoon to remove wax.
- Wipe the wax warmer liner with a paper towel to remove small flecks.
- Use more cotton balls if you spot hard wax clumps.
- Dip a cloth in isopropyl alcohol and rub stubborn wax residue.
- Rinse the liner under warm water to clear any aroma compound.
- Dry the wax melter completely before you add fresh wax tarts.
The Freezer Method
Silicone dish chills in the freezer for 10 to 15 minutes. Cold makes old scented wax shrink.
- Slide a silicone dish or wax melt liner from your wax burner onto a refrigerator shelf or freezer tray.
- Leave the dish in the freezer for 10 to 15 minutes to shrink the wax fully.
- Push wax aside with your thumb for easy removal of the chilled piece.
- Pop any loose pieces out with a wax popper; collect them for reuse or safe disposal.
- Wipe the empty dish with a cloth or paper towel to prevent wax buildup and odor.
- Reassemble the wax burner for proper warmer care and fresh-scented melts.
Tips for Maintaining Your Wax Warmer

Treat your wax warmer like a good friend. Simple care helps it last and smell fine.
- Change your wax often. Swap old scented wax melts and any remaining wax after each run to cut mixed taste and keep pure fragrance.
- Rinse trays after each waxing session. Dry them well before reuse to protect hygiene and shine.
- Pick soybean melts over mineral wax. They burn far cleaner than candle wax and last up to 20% longer.
- Skip acetone for stain removal. Warm water and mild soap handle a spill without harm.
- Check the power switch and heat dial before each use. A faulty circuit can burn spilled wax onto fabrics or ruin nearby laundry.
What to Do with Removed Wax
You can reuse wax melts. Scent fades, yet you can mix used wax chunks with fresh new scented wax for extra hours of aroma. This trick cuts waste, saves cash, and keeps your warmer busy.
It works well on oil-based wax and natural beeswax tarts too.
Never pour wax down the drain. Post-Wax Oil lifts residue from hard surfaces, like glass trays or ceramic pots. Dry-clean-only liners need a gentle wipe; never toss them in the washer.
Follow cleaning instructions for proper maintenance of your wax warmer and wax melt liners.
Takeaways
Treat your electric wax melter like a trusty friend. Give it a spa day now and then. Clear the tart dish with hot water or a freezer trick. Swap old soy wax tarts for fresh beeswax cubes.
Drop a silicone liner in place to skip the scrub. Keep the scent bright and the room happy.
FAQs
1. How do I clean your warmer before adding new wax?
Let leftover wax harden, then pop it out. Give it a tiny spa day with warm water and mild soap. A soft cloth and these cleaning tips make it shine. Dry it well, then pour in new wax.
2. Can I use the same cleaning process for natural wax like beeswax and synthetic wax like paraffin?
Yes. First clear out the old wax. Then add warm water and a drop of soap. A soft brush or cloth removes the bits. Rinse, dry, and this cleaning process works for both beeswax and paraffin.
3. How can I keep your wax warmer reusable?
Wipe out extra wax after each melt, do a quick wash, then dry it. Tuck it away in a cool spot. Treat it right, and it stays reusable for many melts. Think of it like giving your favorite mug a rinse.
4. What care of your wax helps me pick quality wax?
Check the label for a clean burn and pure ingredients. Store bars in a sealed bag, away from heat or sun. This care of your wax keeps scents fresh. Quality wax melts smooth, with no gunk.